
Why Rough In Plumbing Is the Foundation Everything Else Depends On
If you are building a new home, adding a bathroom, or undertaking a significant renovation, you will encounter rough in plumbing at the start of the process — before walls are closed, before tiles go down, before any fixture is visible. It is the phase that most homeowners never see and rarely think about, but it determines whether everything that comes later works correctly.
Get the rough in plumbing right and your home’s plumbing system functions reliably for decades. Get it wrong — wrong measurements, incorrect pipe slope, missing vent connections — and the problems that follow can be expensive and disruptive to fix, because fixing them often means opening walls and floors that have already been closed and finished.
Understanding what rough in plumbing involves, what the standard measurements are, what inspectors look for, and what the realistic costs look like is valuable knowledge for anyone involved in a construction or renovation project. Whether you are supervising a plumber, planning a budget, or just trying to understand what is happening on your job site, this guide gives you the practical foundation you need.
Rough in plumbing is the first phase of a plumbing installation in new construction or major renovation, completed before walls, ceilings, and floors are closed with drywall or other finish materials. It involves running all supply pipes that will carry water to future fixtures, installing all drain and waste pipes that will carry wastewater away, and connecting the vent pipes that allow the drainage system to function properly — leaving stub-outs in the correct positions for fixtures to connect to later.
Quick Summary
This guide explains what rough in plumbing is, walks through the full process, covers standard dimensions and measurements for common fixtures, addresses inspection requirements, provides realistic US cost ranges, and clarifies when professional plumbers are necessary for this phase of work.
What Rough In Plumbing Actually Means
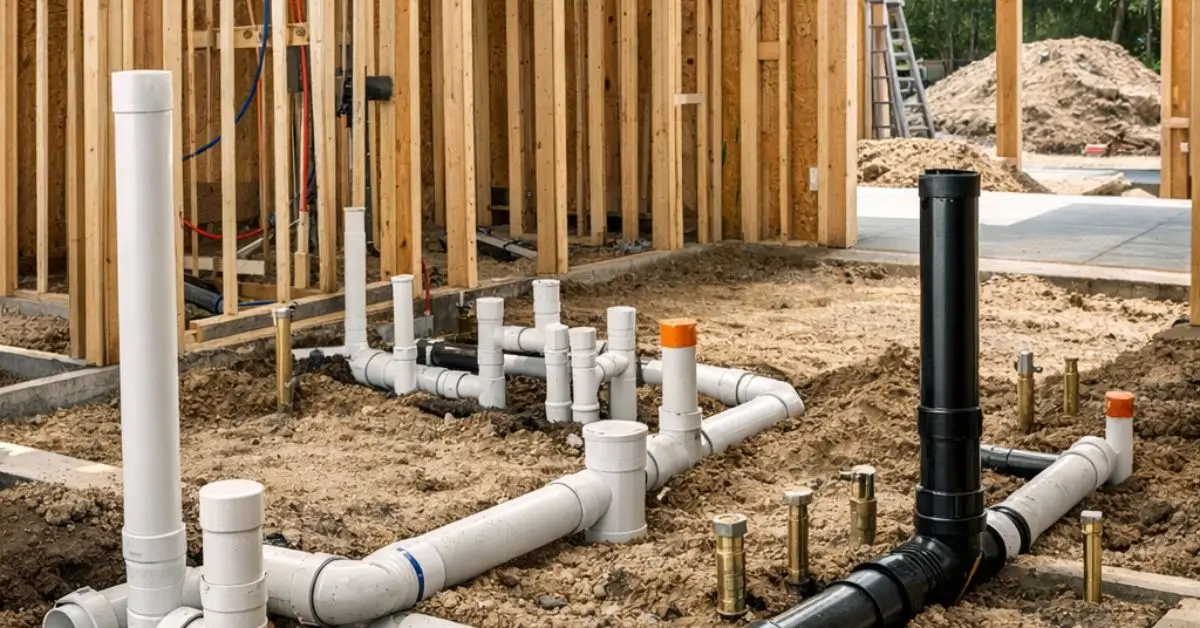
The term “rough in” refers to the rough, unfinished state of the work. Pipes are run through framing — through wall studs, floor joists, and ceiling framing — without any fixtures attached. The visible ends of the pipes are left protruding from walls and floors at specific positions determined by the fixtures that will eventually connect to them.
Think of rough in plumbing as building the infrastructure that the finished plumbing system will plug into. The supply pipes end in stub-outs — short sections of pipe capped off — at the precise heights and locations where sink faucets, shower valves, toilet supply lines, and appliance connections will eventually be made. The drain pipes end at floor-level openings positioned where toilet flanges will sit and where sink drain connections will connect.
The entire rough in phase happens before walls are covered. This is why timing matters so much. Once drywall is up and finishes are applied, accessing pipes requires opening walls — a costly and disruptive process. Getting everything positioned correctly during rough in prevents the need for that.
The Three Systems in Rough In Plumbing
Every rough in plumbing project involves three interconnected systems. Understanding each helps you follow what your plumber is doing and why.
Supply Line Rough In
Supply lines carry pressurized water — both cold and hot — to each fixture location. During rough in, these pipes are run from the main water supply through the home’s framing to the location of each future fixture.
Cold water supply pipes branch from the main line and run to every fixture. Hot water supply pipes run from the water heater to the same fixture locations, traveling alongside the cold supply pipes.
Supply stub-outs — the short pipe ends that stick out from the wall — are left at specific heights depending on the fixture. A bathroom sink has supply stub-outs at a different height than a toilet or a shower valve.
Modern US homes use copper, CPVC, or PEX tubing for supply lines. PEX has become increasingly popular in residential construction because it is flexible, easier to run through framing, resistant to freezing, and less expensive than copper.
Drain-Waste-Vent Rough In
The drain-waste-vent (DWV) system is the more complex part of rough in plumbing. Drain pipes carry wastewater away from fixtures by gravity — which means every drain pipe must slope downward toward the main drain at the correct angle. The standard slope for residential drain pipes in the US is 1/4 inch per foot of horizontal run.
Waste pipes connect drains together and route wastewater to the main sewer line or septic system. Vent pipes run upward through the walls and out through the roof — they allow air into the drainage system so water flows freely and prevent sewer gases from entering the living space through fixture traps.
Getting the DWV rough in correct is the most technically demanding part of the phase. Incorrect slope causes slow drains and eventual clogs. Missing or incorrectly sized vents cause drainage problems and can allow sewer gas into the home.
Fixture Rough In Positions
The term “rough in dimension” refers specifically to the measurement from the finished wall or finished floor to the center of a fixture’s drain or supply connection. These measurements determine exactly where the plumber positions stub-outs and drain openings during rough in.
When you buy a toilet, the box will specify the rough in dimension — almost always 12 inches in the US. This tells the plumber where to position the toilet flange during rough in so the toilet fits correctly when installed later.
Standard Rough In Dimensions for Common Fixtures
This is the information that builders, contractors, and homeowners most often need during rough in plumbing. These are the standard measurements used in US residential construction.
Toilet Rough In Dimensions
The toilet rough in dimension is the distance from the finished wall behind the toilet to the center of the toilet drain flange. The standard in the US is 12 inches. Some older homes have 10-inch or 14-inch rough ins — which is why toilet boxes specify the rough in dimension to ensure compatibility.
Supply stub-out for a toilet is typically positioned 6 inches to the left or right of the drain center and 6 to 8 inches above the finished floor.
Bathroom Sink Rough In Dimensions
Supply stub-outs for a bathroom sink are typically positioned at 21 inches above the finished floor and 4 inches to the left and right of the drain center for a standard faucet. The drain connection is typically centered at 24 to 26 inches above the finished floor.
Shower Rough In Dimensions
Shower valve rough in height is typically 48 inches above the finished floor for a standard shower valve. Showerhead stub-out is typically 78 to 80 inches above the finished floor.
Shower drain position is determined by the shower pan dimensions — the drain is typically centered in the shower pan or at a position specified by the pan manufacturer.
Kitchen Sink Rough In Dimensions
Kitchen sink supply stub-outs are typically positioned 8 inches above the cabinet floor and 3 to 6 inches to the left and right of the drain center. Drain connection is typically 24 inches above the finished floor.
Water Heater Rough In
Cold water supply and hot water outlet connections for a tank water heater are typically positioned at the top of the heater — standard stub-out height depends on the heater size, but connections are typically 4 to 8 inches apart centered on the heater location.
A Reference Table: Standard US Rough In Dimensions
| Fixture | Drain Center from Wall | Supply Height Above Floor | Supply Offset from Drain Center |
|---|---|---|---|
| Toilet | 12 inches (standard) | 6–8 inches | 6 inches left or right |
| Bathroom sink | Centered on vanity | 21 inches | 4 inches left and right |
| Bathtub | Per tub specs | 24 inches | Per tub specs |
| Shower valve | N/A | 48 inches | Centered in shower |
| Showerhead stub | N/A | 78–80 inches | Centered in shower |
| Kitchen sink | Centered on sink | 8 inches above cabinet floor | 3–6 inches left and right |
These are standard dimensions. Always verify against the specific fixture manufacturer’s installation instructions before finalizing rough in positions.
The Rough In Plumbing Process — Step by Step
Understanding the sequence of rough in plumbing work helps homeowners and project managers coordinate effectively on a construction site.
Step 1 — Planning and layout. Before any pipes are run, the plumber reviews the construction drawings and marks fixture locations on the floor and walls. This is where the exact position of every drain, supply, and vent stub-out is determined. Mistakes at this stage lead to incorrect rough in positions that are expensive to fix later.
Step 2 — Underground or under-slab work. For slab-on-grade construction, drain lines must be installed before the concrete slab is poured. This is called underground rough in or under-slab plumbing. Supply lines may also run under the slab in some designs. This phase requires careful planning because the concrete will cover all of this work permanently.
Step 3 — Above-slab or in-wall supply runs. For homes with crawl spaces or basements, supply lines are typically run below the floor framing. In all construction types, supply lines are also run through wall framing to reach fixture locations on upper floors or within wall cavities.
Step 4 — Drain-waste-vent installation. This is typically the most time-consuming part of the rough in phase. Drain pipes are cut into the floor framing at the correct slopes, vent pipes are run up through the walls, and all connections are made to the main drain and vent stack.
Step 5 — Stub-outs and capping. All supply lines are terminated in stub-outs at the correct positions and heights, capped to prevent contamination. Drain openings are positioned at the correct locations and protected from debris during construction.
Step 6 — Pressure testing. Supply lines are tested under pressure to confirm there are no leaks in the rough in work. DWV systems are tested by plugging all openings and filling with water to verify watertightness.
Step 7 — Rough in inspection. The local building inspector reviews all rough in plumbing before walls can be closed. This is a required step in virtually all US jurisdictions.
The Rough In Inspection — What Inspectors Look For
The rough in inspection is a critical checkpoint that protects homeowners and ensures the work meets code requirements before it becomes inaccessible behind finished walls.
Inspectors typically verify:
- All drain pipes slope at the correct 1/4 inch per foot minimum
- Vent pipes are correctly sized and connected
- All connections are watertight — verified by pressure or water test
- Pipe materials are appropriate for their application
- Support hangers are correctly spaced for each pipe type
- Fixture rough in positions match the building drawings
- All penetrations through fire-rated assemblies are properly protected
If the rough in inspection fails, the plumber must correct the deficiencies and schedule a re-inspection before construction can proceed. This is why experienced plumbers who know local code requirements save time and money even if their initial quote is slightly higher.
Do not close walls before the rough in inspection is passed and documented. This is non-negotiable. A home sold with uninspected plumbing can face serious issues at resale.
Rough In Plumbing Costs in the USA
Rough in plumbing costs vary based on house size, number of bathrooms, complexity of the plumbing layout, and regional labor rates.
Typical cost ranges for US residential rough in plumbing:
- Single bathroom rough in — $1,500 to $4,000
- Full house rough in (new construction, 3 bed/2 bath) — $4,000 to $9,000
- Full house rough in with basement and multiple bathrooms — $7,000 to $15,000
- Under-slab plumbing addition — $1,000 to $3,000 additional
These ranges reflect labor and materials. Regional variation is significant — rough in plumbing in San Francisco or New York will run considerably higher than the same work in rural Tennessee. Always get multiple written estimates from licensed plumbers for your specific project and location.
Conclusion
Rough in plumbing is genuinely the foundation that your home’s plumbing system is built on. It is invisible once construction is complete, but it determines whether everything that comes after — the fixtures, the drainage, the water pressure, the venting — works correctly for the life of the building.
Understanding the process, the standard dimensions, the inspection requirements, and the realistic costs gives you the knowledge to oversee your project effectively, communicate with your plumber clearly, and make informed decisions about where professional expertise is genuinely necessary.
If this guide helped you understand what rough in plumbing involves and how to approach your specific project, explore more content on plumbing fixture installation, bathroom addition planning, and how to work effectively with licensed plumbing contractors to get the best results on your home.
Frequently Asked Questions
What is rough-in plumbing?
Rough-in plumbing is the first stage of plumbing installation, where water supply, drain, and vent pipes are installed before walls and floors are finished.
What is the standard toilet rough-in in the USA?
The standard toilet rough-in is 12 inches from the finished wall to the center of the drain. Some homes use 10-inch or 14-inch rough-ins.
How long does rough-in plumbing take?
A bathroom rough-in usually takes 1–2 days, while a full house typically requires 3–5 days, depending on the project size.
Do I need a permit for rough-in plumbing?
Yes. Most US jurisdictions require a plumbing permit and inspection before walls are closed.
Can a homeowner do rough-in plumbing?
Some areas allow homeowners to do their own plumbing with a permit, but hiring a licensed plumber is recommended to ensure code compliance and avoid costly mistakes.